
Imprint a Face onto a Volume
Create a box and imprint a quadrant of a circular face onto it using the decompose and stitch tools.

Goals
In this tutorial, you will learn how to:
- Create a box
- Create a cylinder at a vertex
- Decompose a face using a volume
- Stitch faces to form a volume
Assumptions
- You have activated the Caedium Builder add-on or Caedium Professional.
- You are familiar with Caedium essentials.
Create a Box
Select the Geometry Tool Palette.
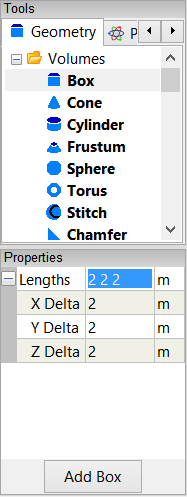
Select the Volumes->Box tool. In the Properties Panel, set Lengths to [2 2 2]. Press Enter on the keyboard to apply the changes to the Properties Panel.
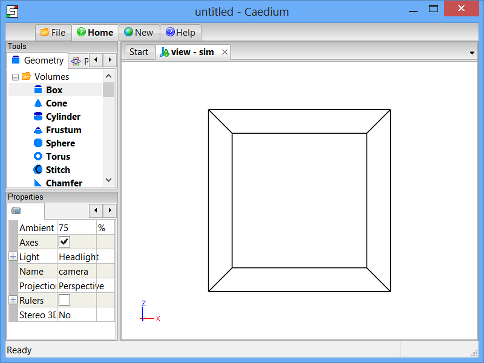
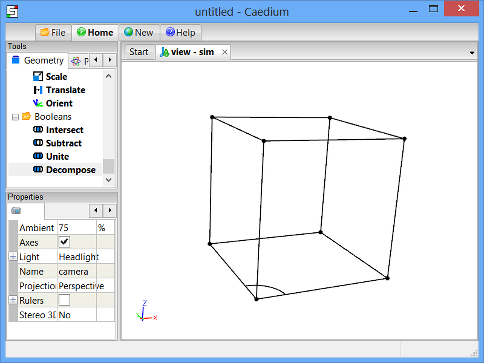
Drag and drop the Volumes->Box tool onto the View Window (view). Select Done to create a box (volume).
All geometry is created at the origin by default.
Create a Cylinder
You will create the cylinder using a vertex of the box as the center of the cylinder's base, so first of all you will need to display the box's vertices.
Right-click on the background of the View Window (view), double-click sim->Vertices, and then select Properties from the menu. In the Properties Panel, turn off the Transparent property to reveal the box's vertices.

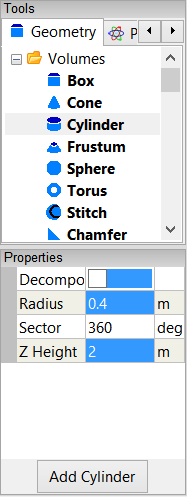
In the Geometry Tool Palette, select the Volumes->Cylinder tool and turn off the Decompose property in the Properties Panel. Set the Radius to 0.4 and set the Z Height to 2. Press Enter on the keyboard to apply the changes to the Properties Panel.
The Decompose option instructs Caedium to split the cylinder into six four-edged faces. This option is useful in simplifying the meshing process.
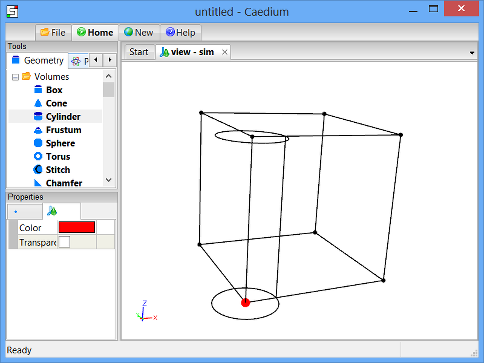
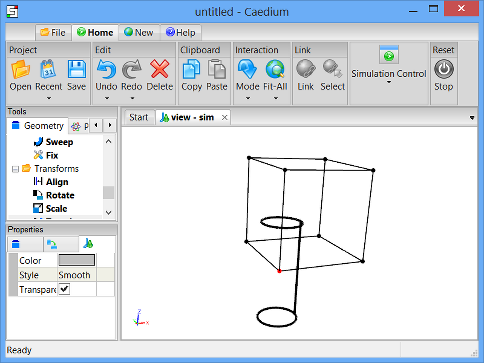
Drag and drop the Volumes->Cylinder tool directly onto the box (volume) vertex (shown in red) at the origin. Double-click the first vertex in the Select dialog and select Done to generate a cylinder (volume_1).
Translate the Cylinder
The cylinder needs to be translated in the -Z-direction to ensure a good overlap (avoid coincident geometry) between the cylinder and the left-side face of the box in the image above (the box-base face), ready for the Boolean operation.
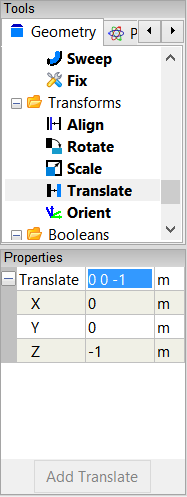
To translate the cylinder (volume_1) to a new location in the View Window, select the Transforms->Translate tool. In the Properties Panel set Translate to [0 0 -1] and press Enter on the keyboard to apply the changes.
Drag the Transforms->Translate tool and drop it directly onto an edge of the cylinder in the View Window. Select Done to translate the cylinder.
In the Home Toolbar click the Fit-All button  to see all the geometry in the View Window.
Shade the Box-Base Face
Shade the box-base face (as shown below) to make it easier to identify and select. Right-click on one of its edges, select the face in the Select dialog (it will be highlighted in the View Window), click OK, and then select Properties from the menu. In the Properties Panel, turn off the Transparent property.

Decompose the Box-Base Face using the Cylinder
Drag and drop the Booleans->Decompose tool directly onto the box-base face. Double-click the first face in the Select dialog to select the face. Select Select/Deselect from the menu, right-click on the edge of the cylinder (volume_1). Double-click volume_1 to select the cylinder. Select Done to decompose the box-base face into 2 faces.
Stitch Faces into a Volume
To stitch all of the faces together into a volume, select the Volumes->Stitch tool, and drag and drop it onto the background of the View Window. Double-click sim->Faces in the Select dialog and then select Done from the menu.
Notes
The complete geometry created in this tutorial is available as a free download: imprint-face-volume.brep (5 KB).
See the "Incompressible Transient Flow with Heat Transfer" tutorial for a flow simulation within this geometry.
- Login to post comments
Select Language
Free 30-Day Trials

Feedback
Questions? Ideas? Problems?
