
View a Mesh
Caedium doesn't force you to generate and view a mesh in an explicit simulation phase. However, it is often useful to examine a mesh to diagnose simulation problems.
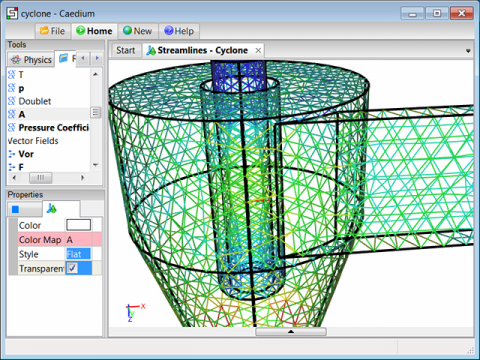 Triangle Surface Mesh in Caedium
Assumptions
- You have downloaded, installed, and activated RANS Flow, Panel Flow or Professional Caedium add-ons.
- You are familiar with Caedium essentials.
- You have loaded a 3D model or project file into Caedium.
Procedure
- Select the Physics Tool Palette. Drag and drop a Substances (e.g., Air) tool onto your volume in the View Window, double-click your volume in the Select dialog and select Done.
- Select all the faces that you want to see the mesh on. In the Properties Panel set:
- Style = Flat
- Transparent = checked (on)
- Select the Results Tool Palette. Drag and drop the Scalar Fields->A (area) tool onto the faces in the View Window and select Color Map to see the mesh.
Notes
A similar procedure can be used to view the mesh on edges, but instead of Scalar Fields->A use Scalar Fields->L (length).
To see a volume mesh select the volume and in the Properties Panel set:
- Style = Flat
- Transparent = unchecked (off)
Then use a volume mesh dependent metric, e.g., Vector Fields->Vol.
To narrow the range of cells displayed you can use the slider bars (thresholders) above and below the View Legend.
Viewing the mesh in this manner doesn't perform the more time-consuming physics calculation. Therefore, this is a great way to ensure that the mesh is adequate to support subsequent physics calculations.
Feedback
Questions? Ideas? Problems?
